*********************************
以前、ここで取上げたように磁気アンテナ(バーアンテナ)にはテストループがMUSTだ。
テストループは90年代には製造されていたかどうかも妖しい。 オイラのは1970年代後半の製造品。
目黒も松下も大松も標準信号発生器用テストループの製造は2000年には終了していた。販売在庫品も底をついた。現行流通品はゼロ状態だった。
さて、そのテストループが数十年振りに製造された。 祐徳電子さんから販売開始された。
自称「ラジオのプロ修理技術者」もこれが入手できるとホっとするだろう。

◇箱を開けた
BNCケーブルも付属していた。
「パイプベンダーの曲げ型をよく見つけたなあ!!」と驚く。昨今、このような小さい直径の金型は市場にないと想うがどこで見つけてきたのか?

◇支柱は「円筒研磨加工後、ハードクロムメッキ処理」と加工プロ仕上げ。日本の会社よりメッキ処理が上手い、こりゃ驚いた。インローに拘って丸研してある。
通常は「ミガキ棒のままニッケルメッキ」が加工費としては安価。
下の写真のように、ハードクロムメッキ処理は国内では2000円以上の鍍金費用になる。
機械設計屋のオイラからみて「贅を尽くした」と想える。

◇スタンドベースは「電着カチオン塗装」。
「ここまで手間掛けるの?」が率直な感想。 今の時代なら黒染めで安価に済ませて終了だろう。


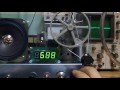
◇さて電波を飛ばしてみる。
正常、受信中。


◇ HF仕様だが、2mまでは信号を入れて確認してある。

6m,2mでバーアンテナを使うかどうか?

祐徳電子の社長さんは、松下電器の元エンジニア。 ラジオ系のエンジニアだ。 それゆえに良く判っている。
よく現代に復刻(復活)させたものだと感動し、感謝します。
復活の切っ掛けは、数人の自称「ラジオのプロ修理技術者」がテストループの必要なことをオイラのblogで知って、祐徳さんに、中古品の捜索依頼を掛けたことがが起因。テストループの内部構造と材質はオイラからも情報提供は行なった。
機械設計屋が作るともっと手間を省いた安直なものになるだろう。
入手希望者は、祐徳さんに問い合わせのこと。
***************************
EBAYでは往時の未使用品(日本製)が、日本円で7~10万円弱で取引されている。 往時のものを必要とするならEBAYにて調達をお薦めする。不思議なことに、テストループアンテナは日本製しかEBAYでは見たことがない。
]]>